Hexo启用Vercel Web Analytics服务教程
前言
Web Analytics是Vercel推出的一项免费的网站服务,并且这项服务对于所有类型的用户都是可用的(甚至包括咱们Hobby白嫖党,说句Vercel良心不过分吧),虽然市面上有很多更好用的网站分析工具可以选择,但毕竟这个是Vercel官方的,免费并且部署简单,而且说不定之后会有新的功能加入,所以这次来教大家启用Web Analytics服务分析自己博客的访客数据。
Web Analytics
简介
借助Vercel推出的Web Analytics网站分析,我们可以通过首页、热门来源网址等指标以及国家/地区、操作系统和浏览器信息等人口统计数据来详细了解我们网站的访问者。
需要注意的是,Web Analytics就是以前的Audiences功能重命名得来的,Web Analytics和Speed Insights是Vercel的两个完全不同的产品。Speed Insights主要用于跟踪网站的性能,类似于谷歌的PageSpeed Insights。
功能
Visitors
Visitors选项卡显示的是选定时间范围内该网站的所有访客数量,单个IP仅进行一次计数。
我们可以通过从右上角的下拉列表中选择一个值来调整时间范围:

我们可以在面板界面查看根据此处的总访客数统计出来的一些细分信息。
Page Views
Page Views选项卡显示的是选定时间范围内该网站的加载的所有页面数量,而页面浏览量和访客数量不同的是,同一个访客可能会查看我们网站的多个页面,这种情况会触发多个事件,从而导致多个计数。
我们同样可以在面板界面查看根据此处的页面浏览量统计出来的一些细分信息。
How visitors are determined
Instead of relying on cookies like many analytics products, visitors are identified by a hash created from the incoming request. Using a generated hash provides a privacy-friendly experience for your visitors and means visitors can’t be tracked between different days or different websites.
The generated hash is valid for a single day, at which point it is automatically reset.
If a visitor loads your website for the first time, we immediately track this visit as a page view. Subsequent page views are tracked through the native Browser API.
Bots
Web Analytics does not count traffic that comes from automated processes or accounts. This is determined by inspecting the User Agent header for incoming requests.
可以看出,Web Analytics这款产品的访客分析方式不像其他类似产品那样依赖 cookie,而是通过根据传入request时生成的哈希值来识别的。而根据他们的文档介绍,使用生成的哈希值可以为访问者提供保护隐私的体验,并且意味着无法在不同日期或不同网站之间跟踪访问者。
生成的哈希值只在一天内有效,届时它会自动重置。
当访客首次加载我们的网站,Vercel会立即跟踪这次访问并算作一次页面浏览量。 后续页面浏览量的计数则会通过访客本机浏览器的 API 进行跟踪。
并且Web Analytics对来自爬虫或者脚本的访问也有很好的过滤功能,他们是通过检查传入request里面携带的User Agent标头信息来实现的。
Panels
这些面板提供了各种查看访问者和页面浏览量的详细分析的方法, 我们可以通过选择不同的选项卡来筛选不同的信息。

价格
Web Analytics的价格是根据我们选择的Plan来确定的,虽然这段与我们白嫖用户来说意义不大,但是我还是把官方的价格表贴出来,大家可以做个了解。
| Hobby | Pro | Pro with Web Analytics Plus | Enterprise | |
|---|---|---|---|---|
| Base Fee per Month | None | None | 50 USD | Custom |
| Included Events | 2,500 | 25,000 | 500,000 | Custom |
| Max Events | 2,500 | 500,000 | 20 Million | Custom |
| Fee for additional Events | None | 14 USD per 100k | 20 USD per 500k | Custom |
| Reporting Window | 1 Month | 12 Months | 24 Months | Custom |
| Custom Events | Not included | Included | Included | Custom |
| Properties on Custom Events | None | 2 | 8 | Custom |
其中我们可以看到,对于Pro Plan的用户,Vercel还推出了专门的Web Analytics Plus升级,由此可见Vercel对于他们的Web Analytics产品也是非常的有信心。
What is an event in Vercel Web Analytics?
An event in Vercel Web Analytics is either an automatically tracked page view or a custom event. A page view is a default event that is automatically tracked by our script when a user visits a page on your website. A custom event is any other action that you want to track on your website, such as a button click or form submission.
What happens when you reach the maximum number of events?
When you reach the maximum number of events allowed for your plan, you won’t be billed beyond that point. Instead, you will be prompted to upgrade to a plan that fits your usage. For example, if you reach the maximum number of events allowed on the Pro plan, you will be prompted to upgrade to the Web Analytics Plus plan, which allows for more events and a longer reporting window.
Is usage shared across projects?
Yes, events are shared across all projects under the same Vercel account in Web Analytics. This means that the events collected by each project count towards the total event limit for your account. Keep in mind that if you have high-traffic websites or multiple projects with heavy event usage, you may need to upgrade to a higher-tier plan to accommodate your needs.
What is the reporting window?
The reporting window in Vercel Web Analytics is the length of time that your analytics data is guaranteed to be stored and viewable for analysis. While only the reporting windows is guaranteed to be stored, Vercel may store your data for longer periods to give you the option to upgrade to a bigger plan without losing any data.
Hexo的接入方法
首先登入vercel,选择自己的一个网站进入详情页面。
点击上方的
Analytics选项卡。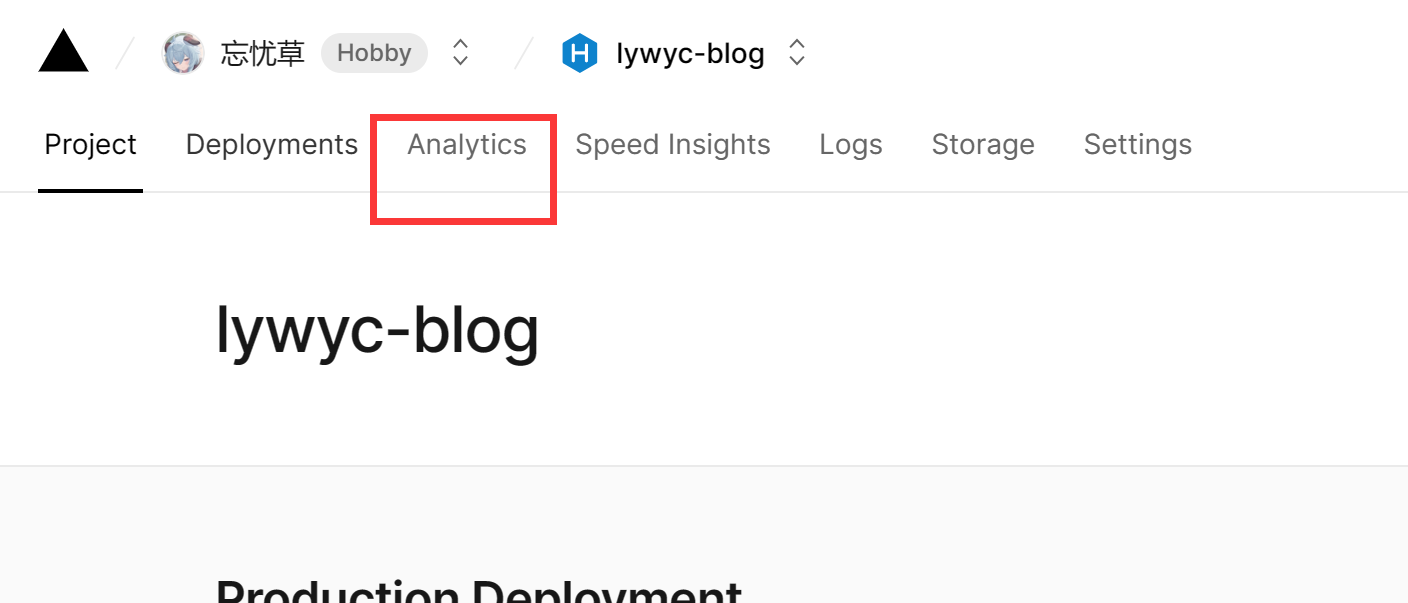
在弹出的启用Web Analytics的页面中选择
Next。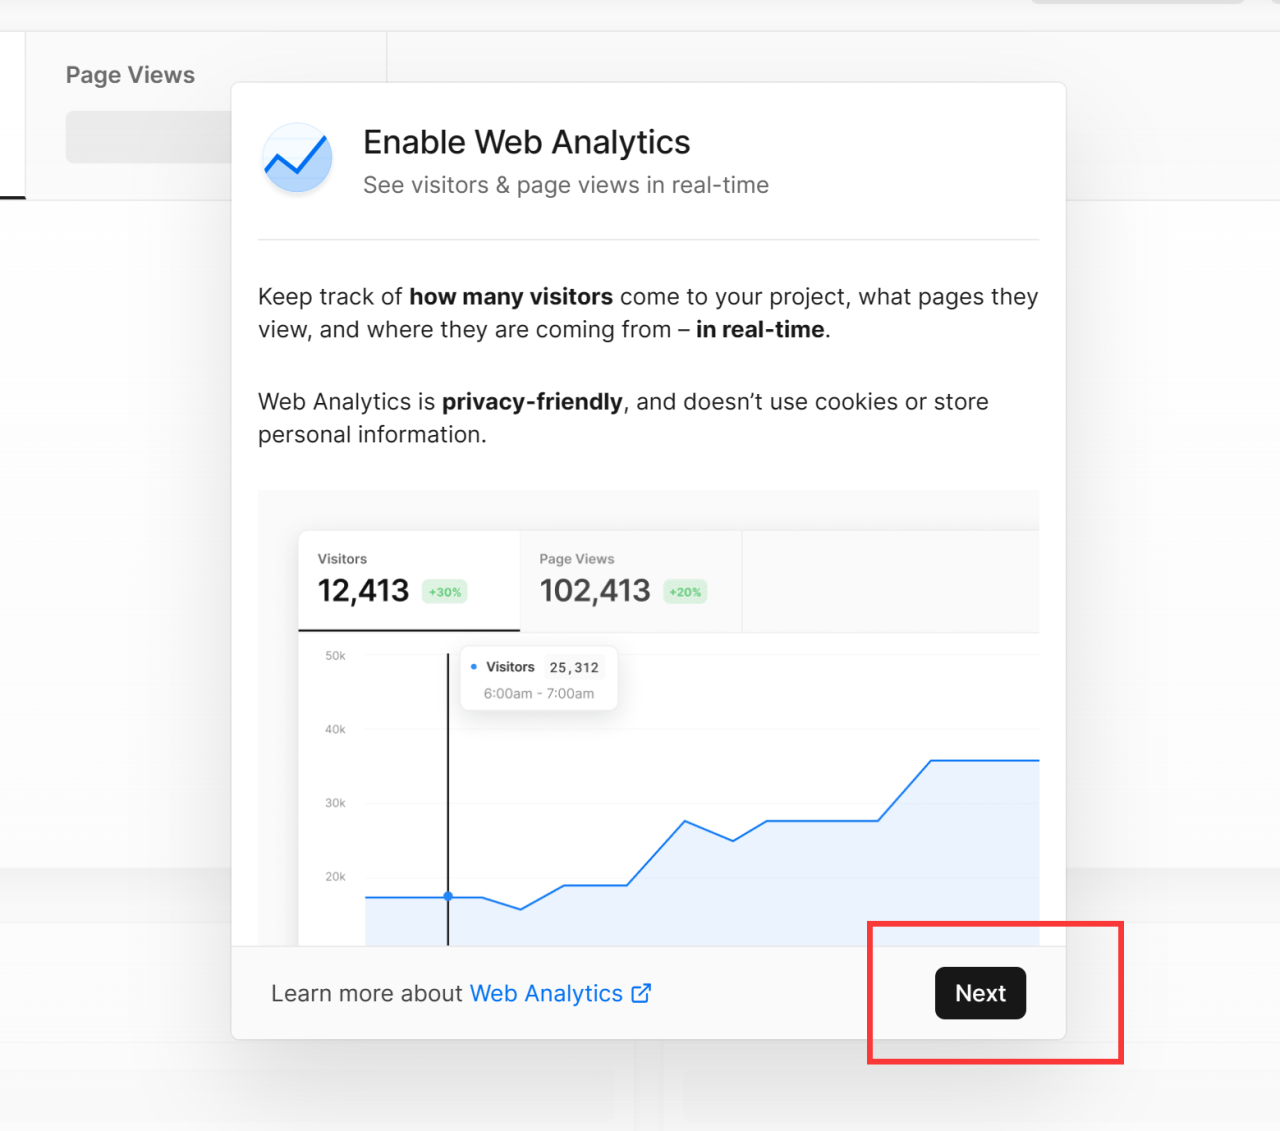
这里会让我们确认自己的Plan,继续点击
Enable。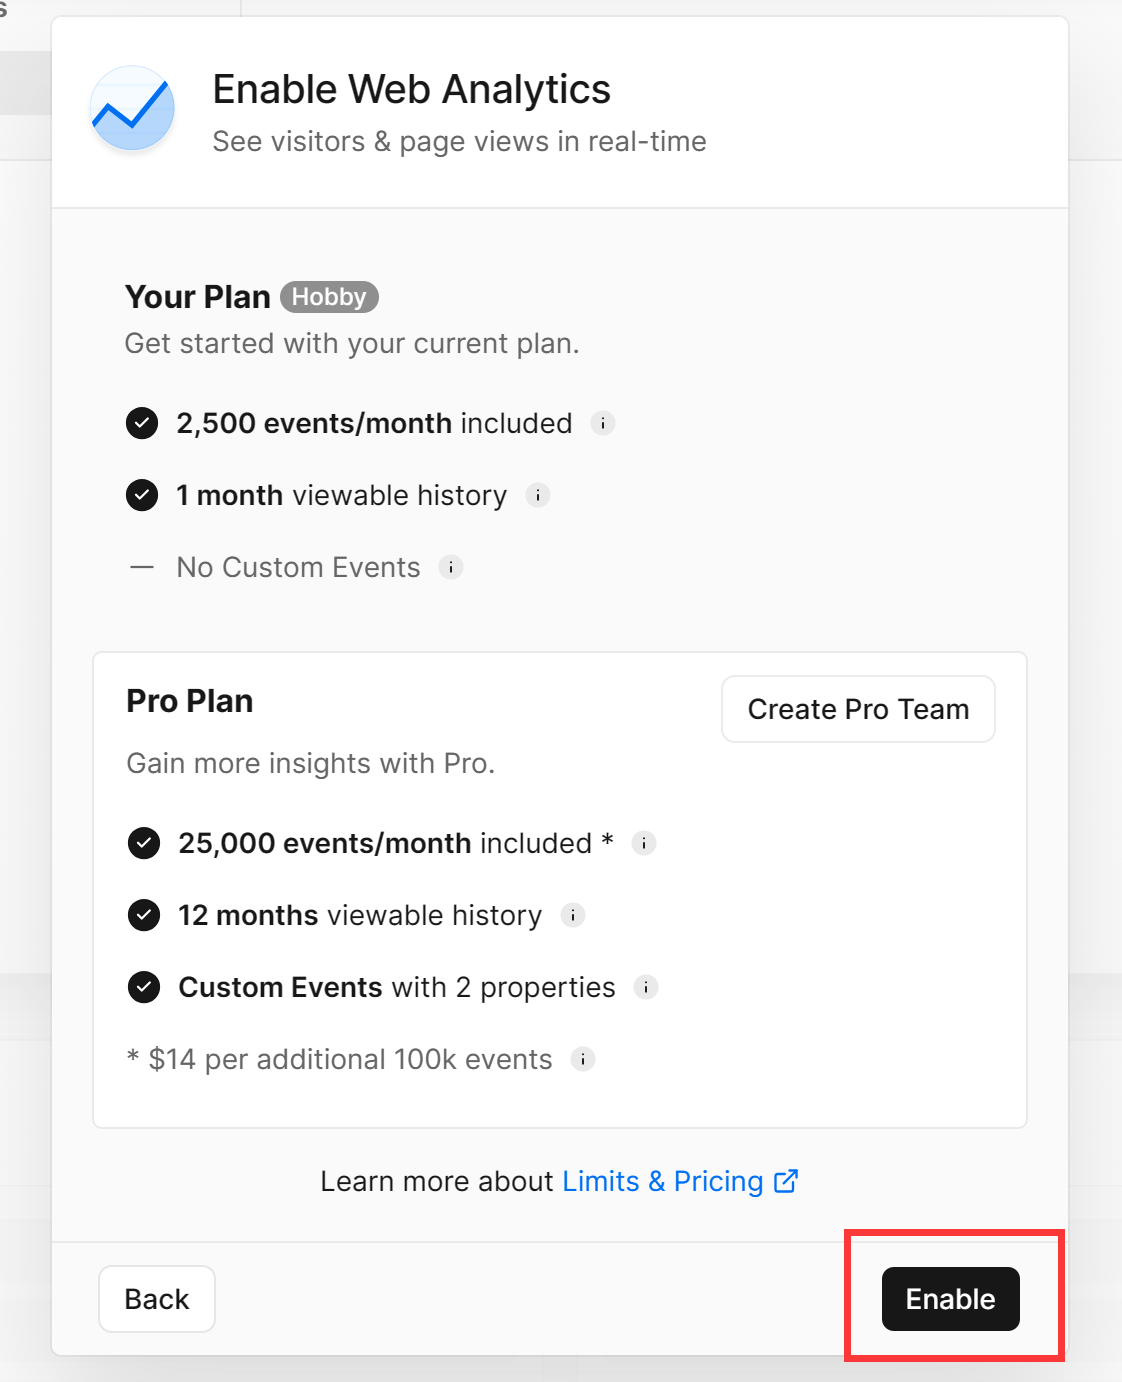
这时候,Web Analytics的启用进入一个等待状态,Vercel提示我们需要安装
@vercel/analytics包并且要导入进我们的工程里才能生效。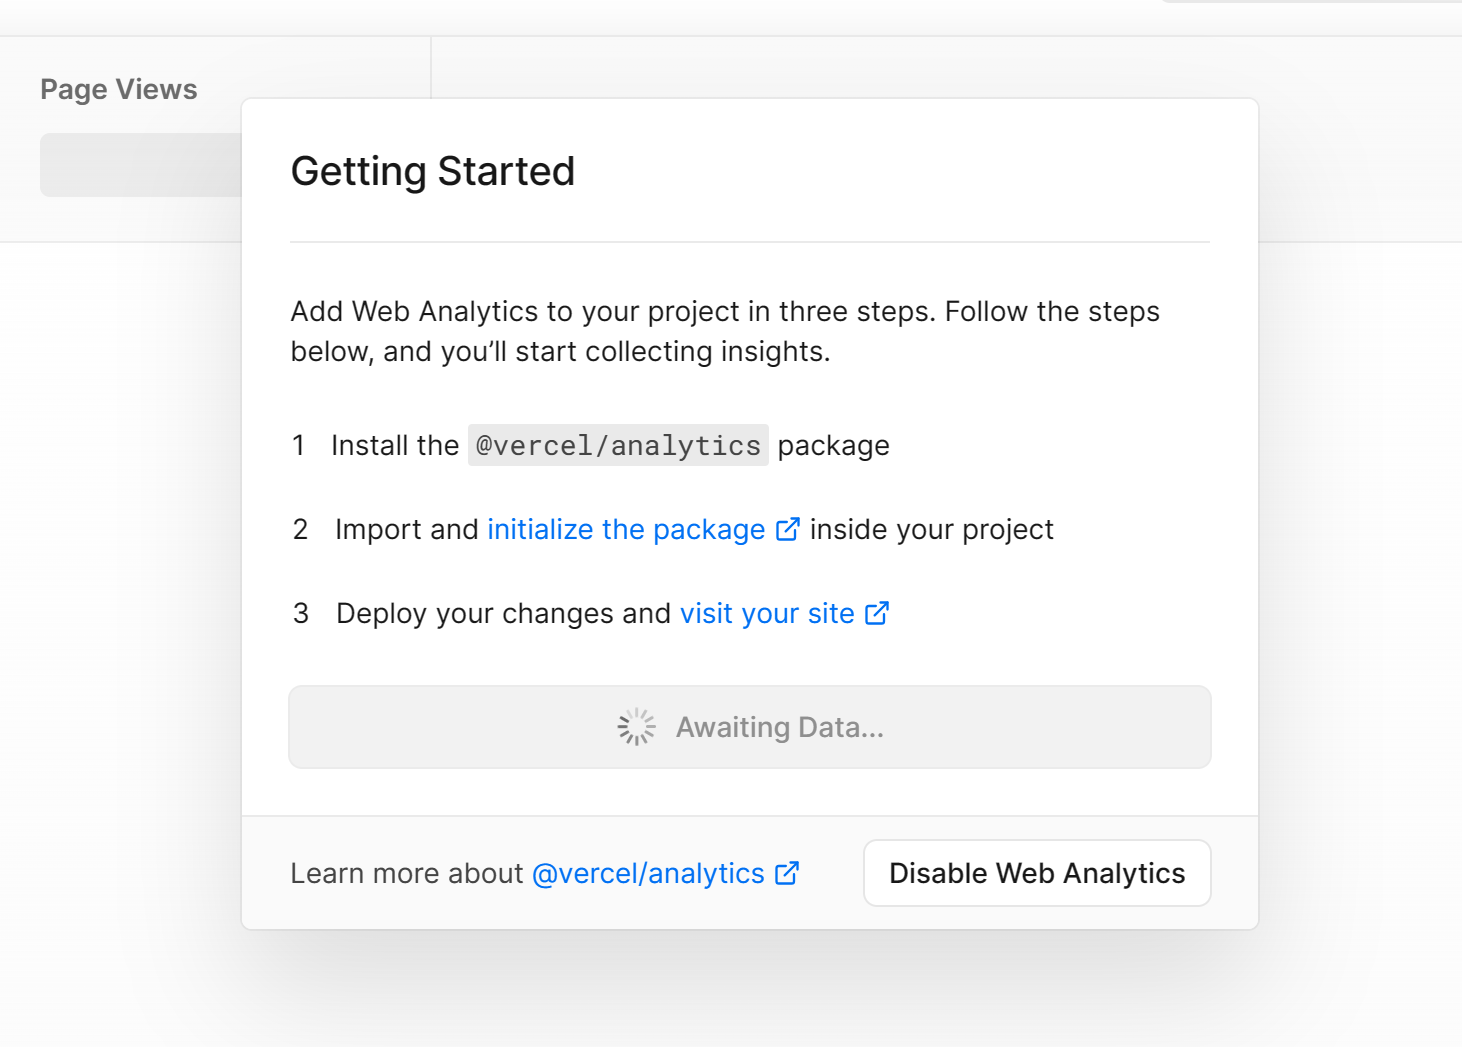
但是我们是静态博客网站,主要依赖于
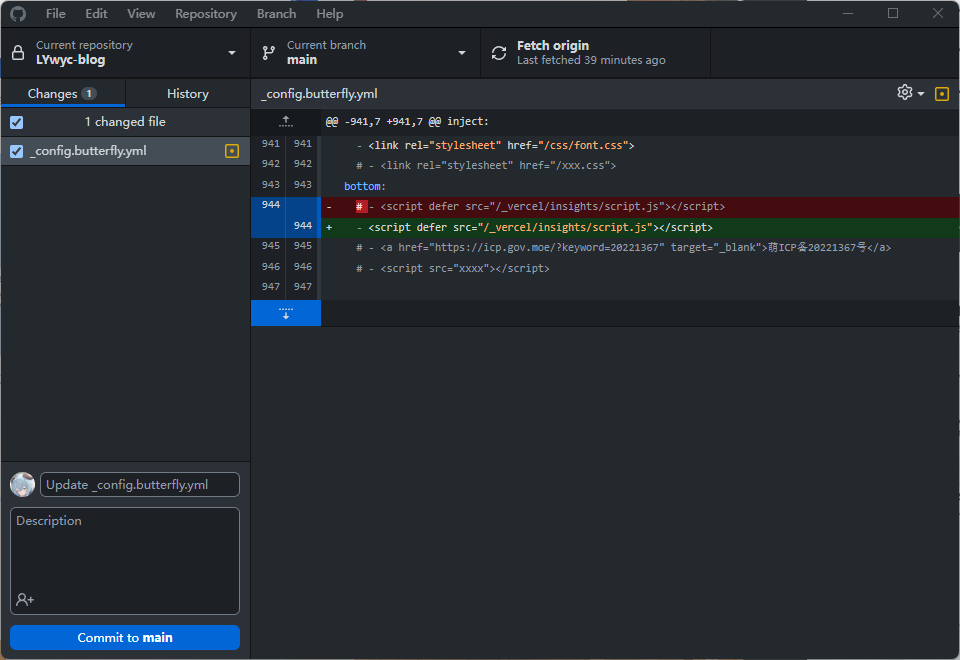
.html文件,根据官方文档的说法我们并不需要安装@vercel/analytics包,在这个状态下如果我们重新生成静态页面,Vercel会在我们的网站目录下创建scripy.js文件,我们只需要在Hexo的配置文件中引入这个.js文件即可启用Web Analytics。打开自己的Hexo主题配置文件,在
inject配置项中插入以下代码:1
<script defer src="/_vercel/insights/script.js"></script>
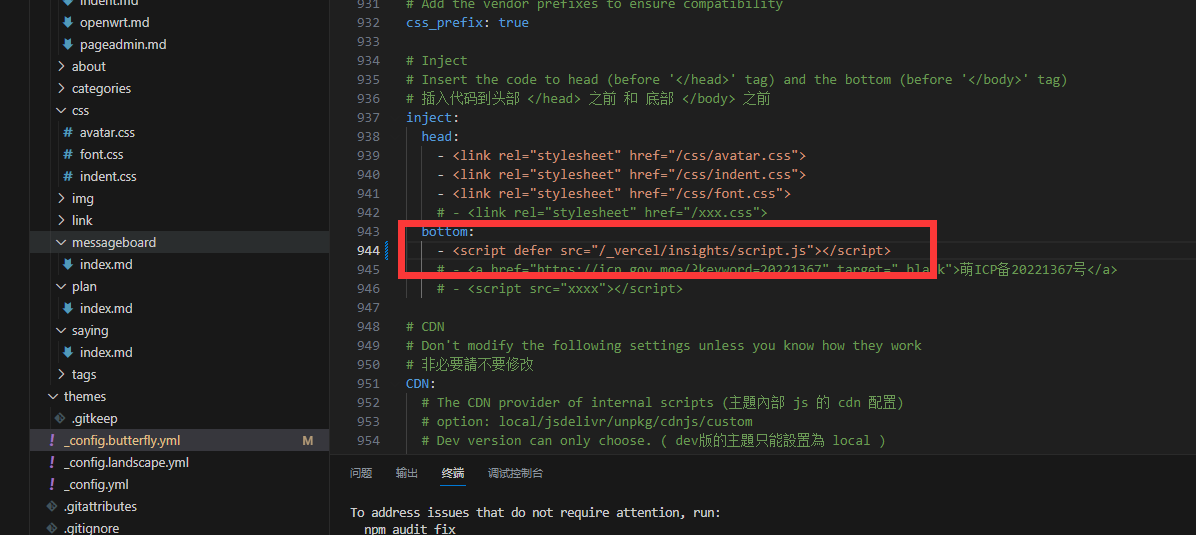
保存并将我们的博客Push至Vercel生成静态页面。
等待Vercel部署成功后(博主设置了邮件提醒),按照提示访问一下我们的网站生成访客数据,使得Web Analytics生效。
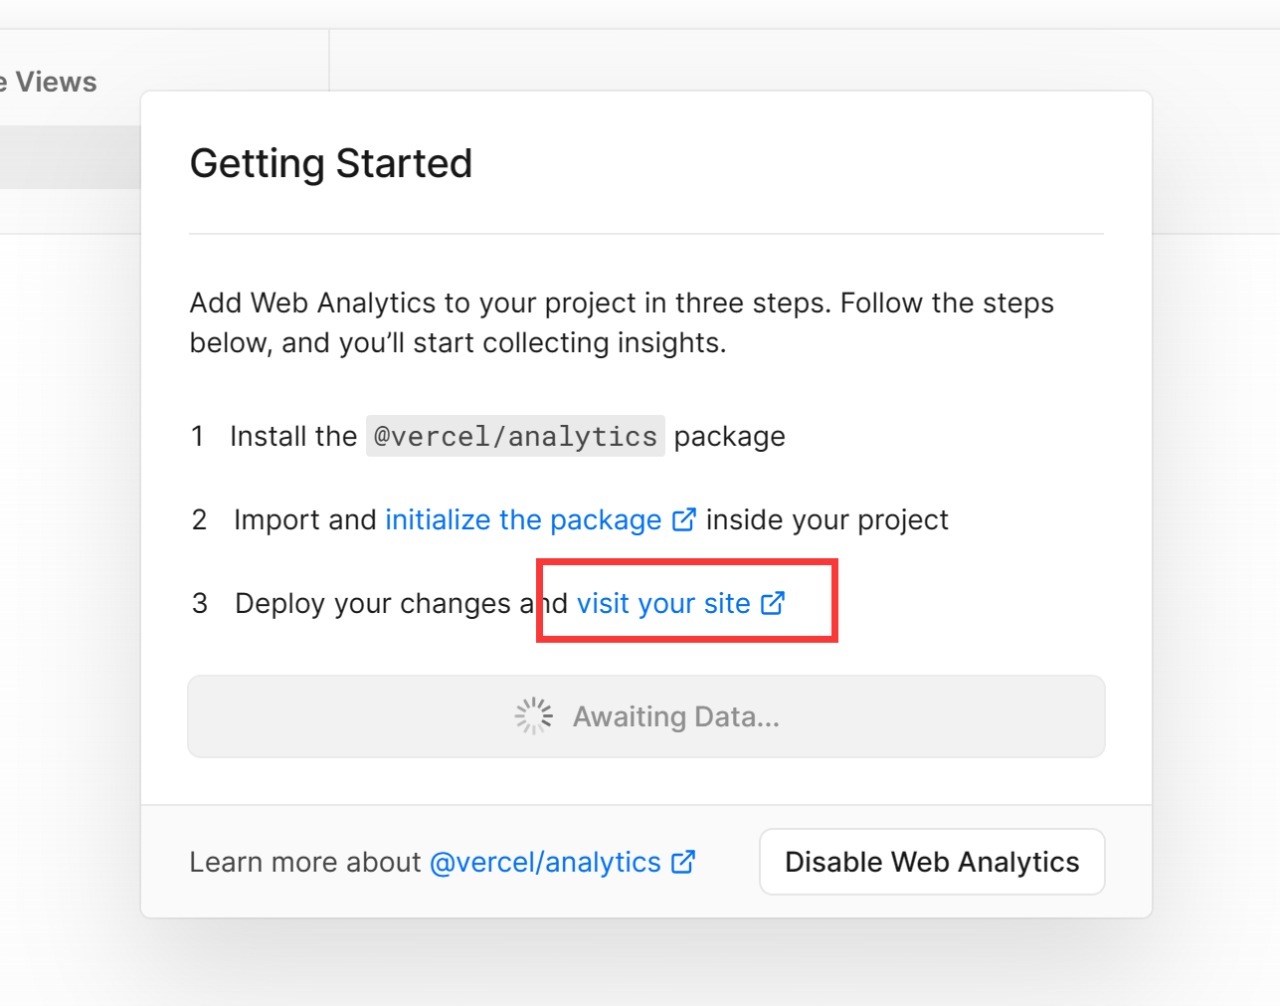
Web Analytics一旦检测到访客数据,会立即自行启用,点击
Start exploring,大功告成!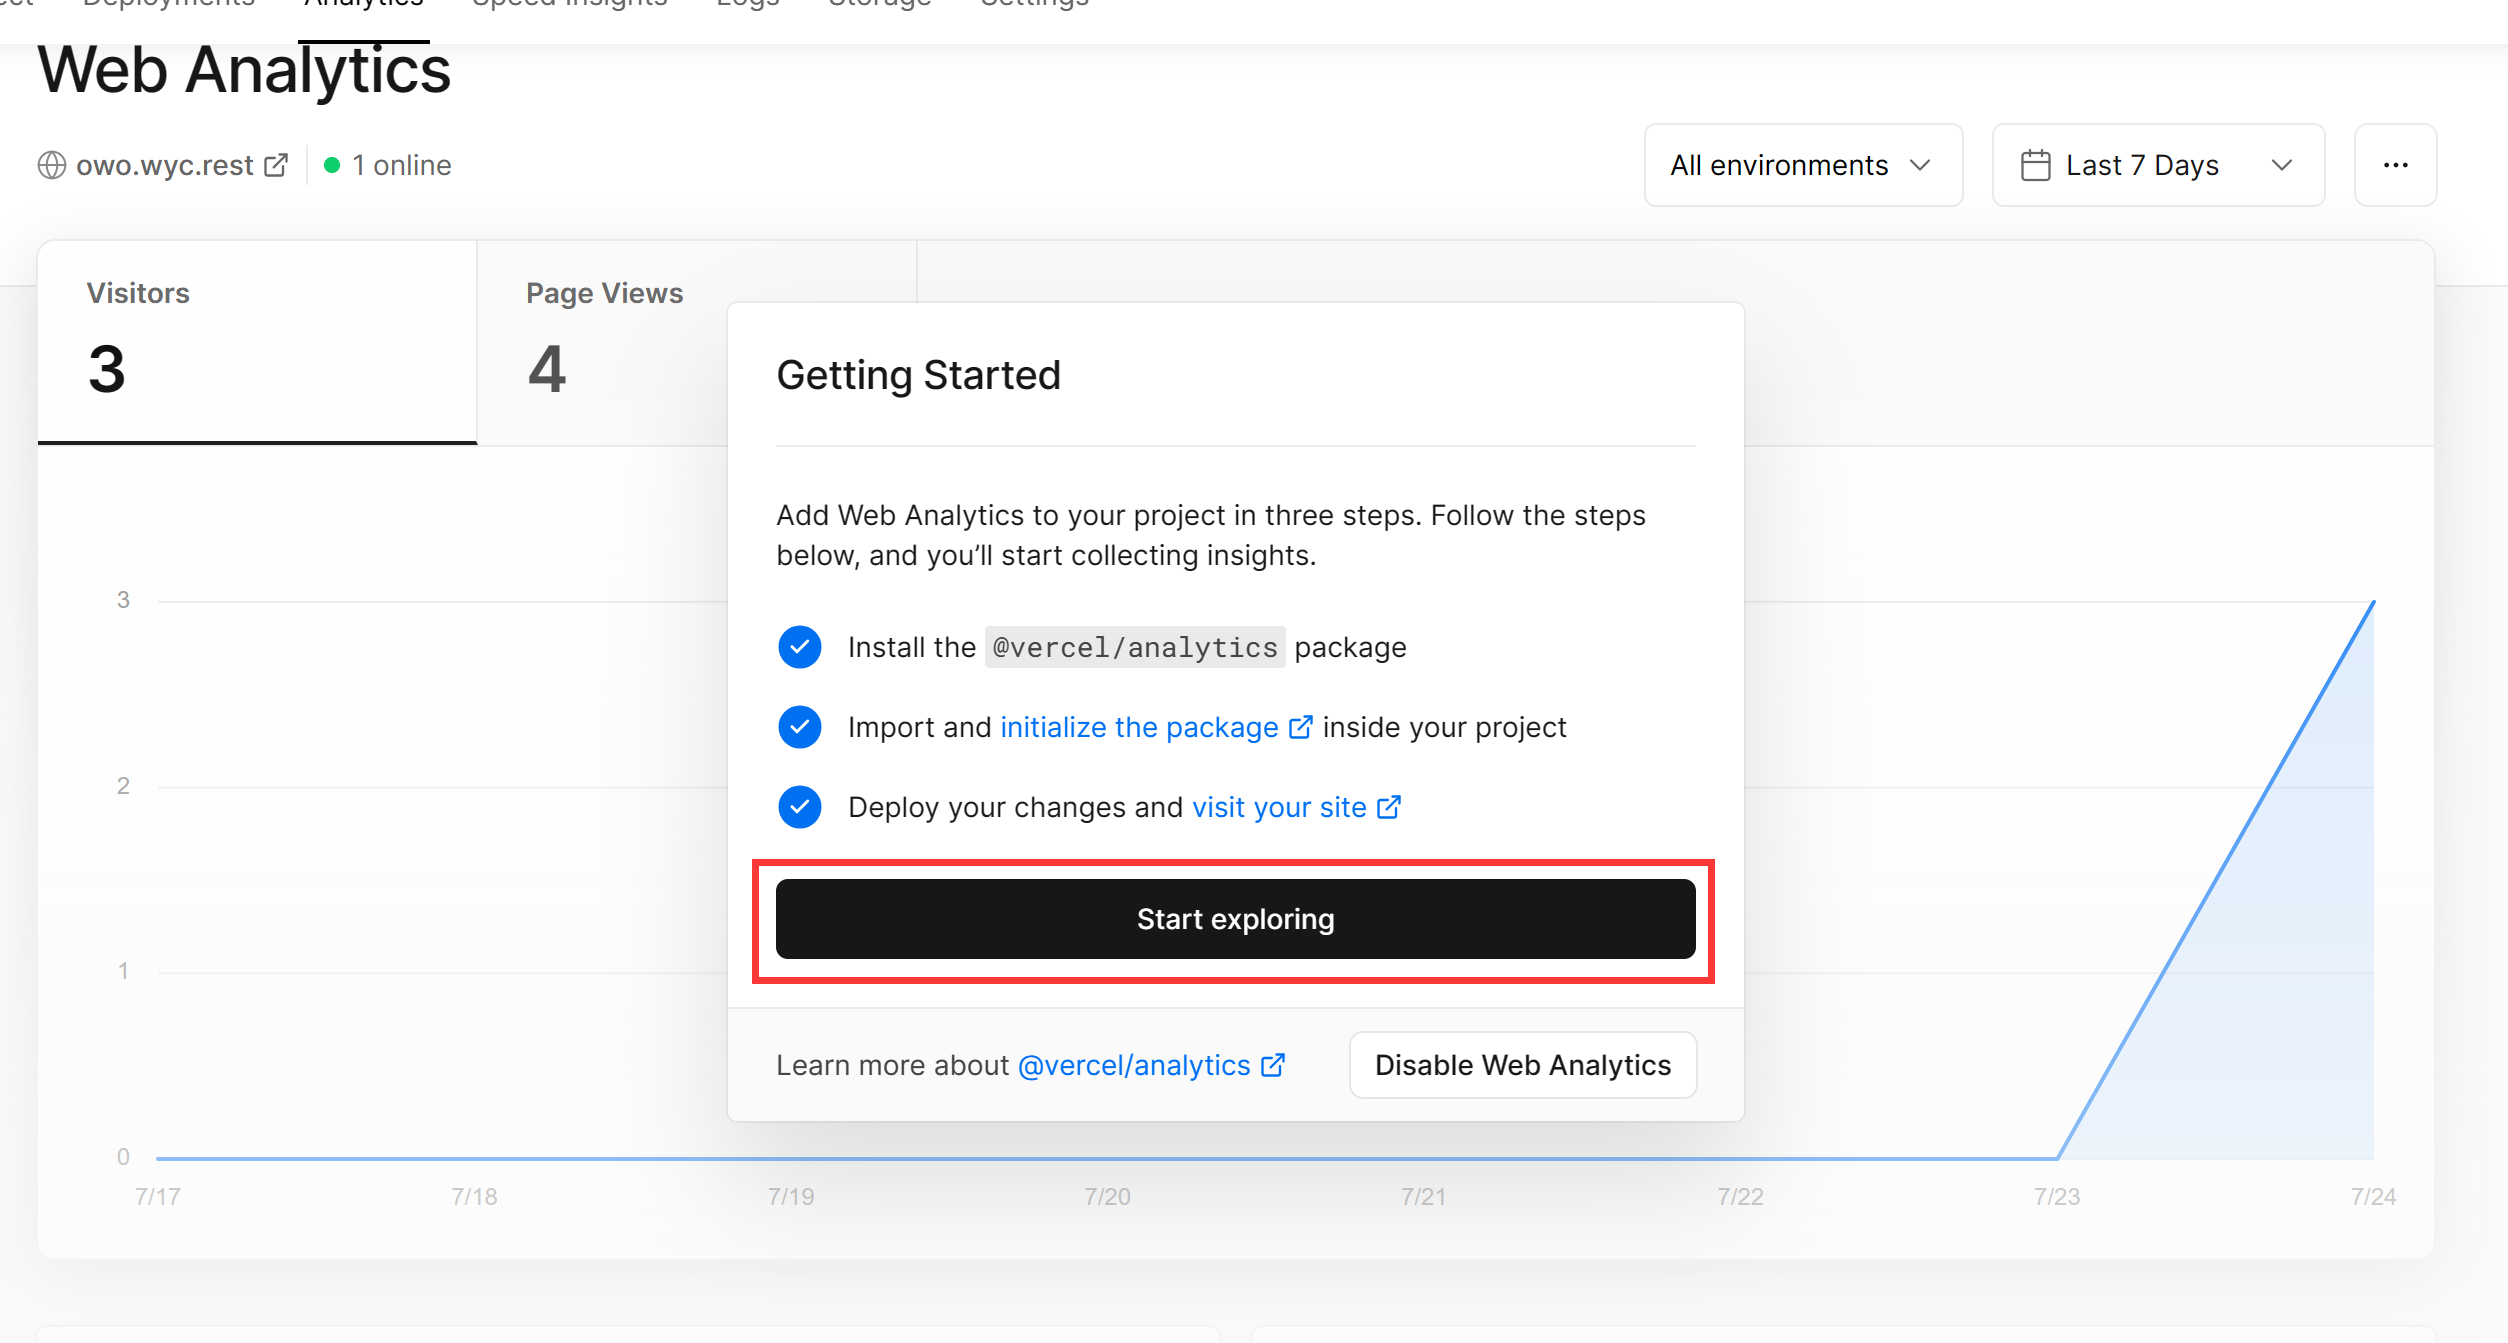
我们可以在网站的源代码中找到Vercel生成的scripy.js文件,代码如下:
1 | "use strict"; |
 支付宝
支付宝 微信
微信


